Don’t you just love DIY projects? There’s something very satisfying about creating something from scratch, and if you’re looking for a fun and creative project to tackle, why not try making your own fake prescription label?
What You’ll Need
To get started, you’ll need a few basic supplies:
- White card stock or label paper
- A printer
- A prescription label template (you can find plenty of free ones online)
- Scissors
- A ruler
- A pen
Step 1: Choose Your Template
There are plenty of free prescription label templates available online, so choose the one that best suits your needs. Some templates are more basic and straightforward, while others are more elaborate and feature fancy fonts and designs. Pick the one that speaks to you!
Step 2: Gather Your Information
Before you start filling in your label, you’ll need to gather all the necessary information. If you’re making a fake prescription label as part of a costume or cosplay, you can use fictional information. But if you want to make it look more authentic, you can use real information (just make sure you’re not breaking any laws!).
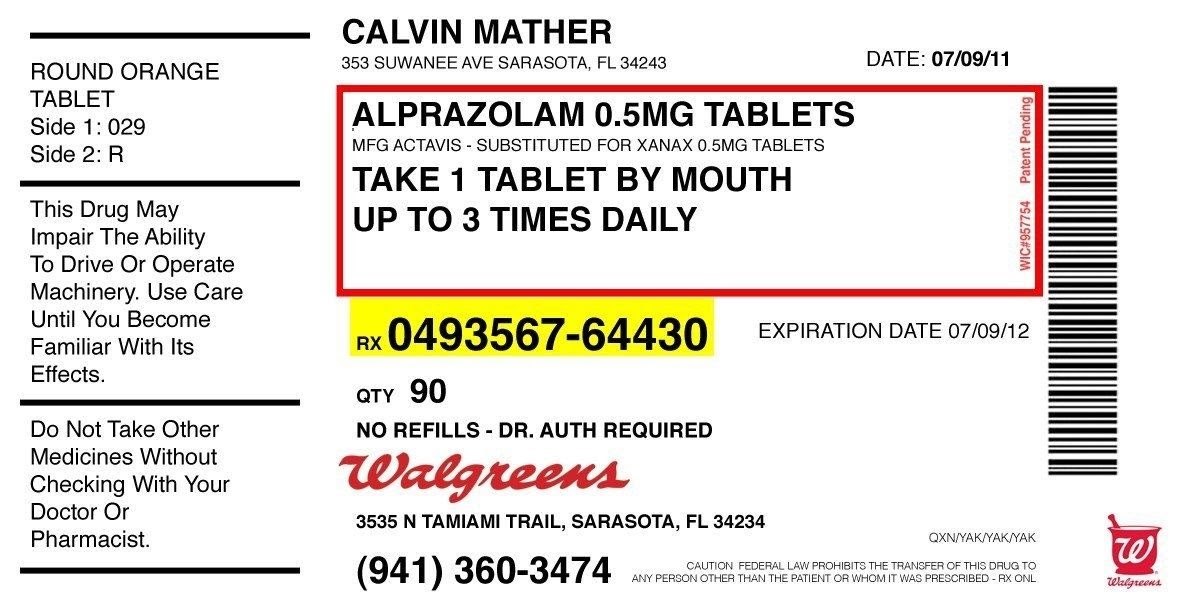
The information you’ll need includes:
- The patient’s name
- The patient’s address
- The prescribing doctor’s name
- The date the prescription was filled
- The name of the medication
- The dosage and instructions for use
Step 3: Fill in the Template
Using a pen, fill in the necessary information on the template. Use a ruler to make sure your writing is straight and even. Make sure to follow all the guidelines on the template, such as where to place the medication name, dosage, and instructions.
If you make a mistake, don’t worry! Just print out another template and start again.
Step 4: Print Your Label
Once you’ve filled in your template, it’s time to print it out. Make sure to use white card stock or label paper to ensure your label looks professional. If you’re using label paper, be sure to follow the instructions carefully to ensure the label prints correctly.
Step 5: Cut Out Your Label
Using scissors, carefully cut out your label. Make sure to cut along the edges of the template to ensure a clean, professional-looking label.
Step 6: Apply Your Label
Your fake prescription label is now ready to apply! If you’re using label paper, simply peel off the backing and apply the label to the container you’re using. If you’re using card stock, use glue or double-sided tape to apply the label.
Step 7: Finishing Touches
If you want to make your fake prescription label look even more authentic, consider adding some finishing touches. You can use a hole punch to create the little circles that appear on real prescription labels, or use a pen to add some smudges or smears to the label to give it a used, authentic feel.
Conclusion
And there you have it! A fun and easy DIY project that’s perfect for Halloween costumes, prank gifts, or just for a bit of creative fun. So go ahead and give it a try - you might just surprise yourself with how professional-looking your fake prescription label turns out!