Do you want to rid your property of irritating bugs and insects while also helping an important yet often misunderstood mammal? Look no further than a bat house! With these simple instructions, you can create a safe and comfortable home for bats while also reaping the benefits of having them as natural pest control.
Step 1: Gather Materials
 Before getting started, make sure you have the following materials:
- 5/8-inch exterior-grade plywood
- 1-inch exterior-grade lumber
- Screws
- Wire mesh
- Paint or sealant
Step 2: Cut the Wood
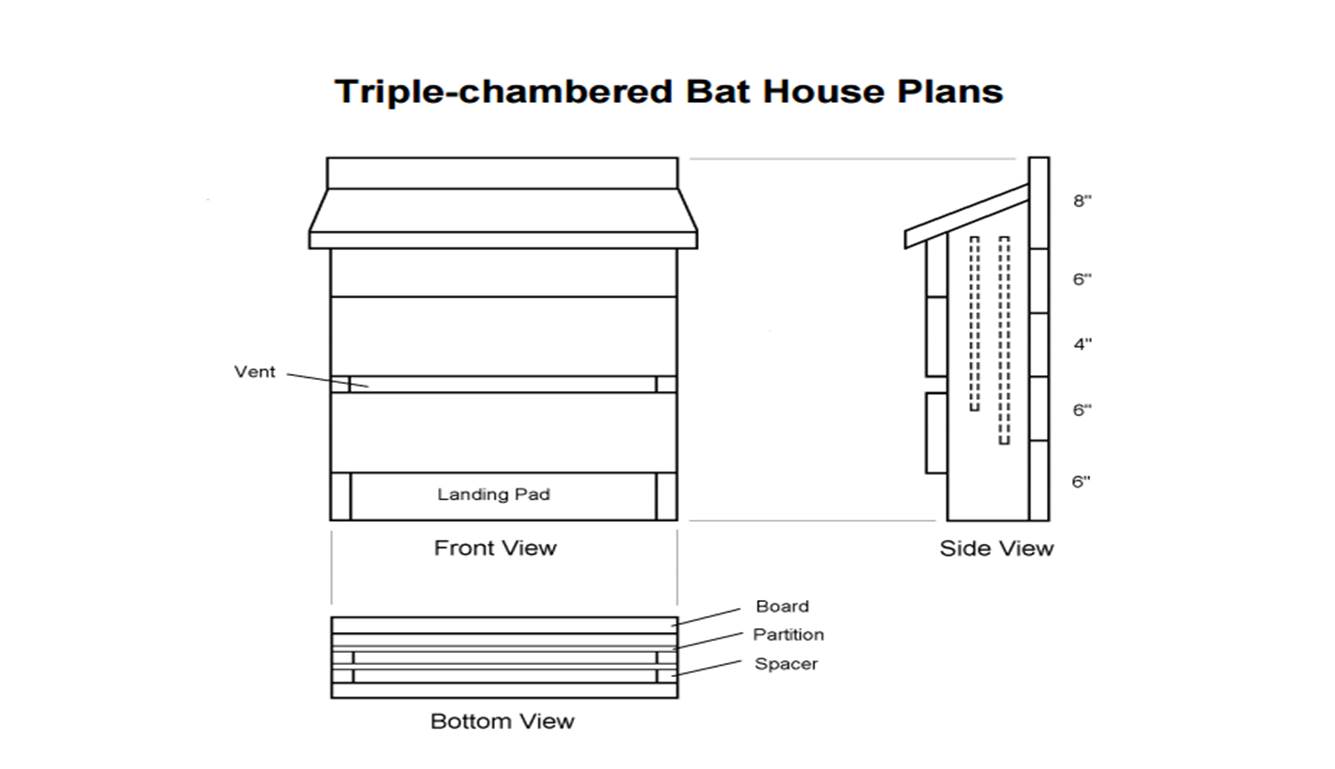
Following the bat house plans, use a saw to cut the plywood and lumber to the appropriate sizes. Make sure to wear proper safety equipment and take your time to ensure accuracy.
Step 3: Assemble the Bat House
Once all pieces are cut, assemble the bat house using screws and wood glue as necessary. Be sure to follow the plans carefully to ensure the bat house is structurally sound and will provide the right environment for bats to roost.
Step 4: Attach Wire Mesh
For added protection and stability, attach wire mesh to the back of the bat house using staples or screws. This will keep the bats safe from predators and ensure the bat house will last for years to come.
Step 5: Paint or Seal the Bat House
To protect the bat house from the elements and give it a long lifespan, it’s important to paint or seal it. Choose a color that will blend in with your property and won’t attract too much attention.
Congratulations, you now have a bat house! It’s important to note that it may take some time for bats to find the new home, so be patient. Once they do, you’ll be amazed at how quickly they can control insect populations around your property.